Texturing
The tutorial consisted of:
-How to create a material from scratch with the basic usage of each of the material properties in the material editor (colour, diffuse, reflection, bump, etc).
-Using images within each property in the material editor.
Using images to affect the various properties. Examples were given on how to take a texture such as an image of a scratched surface and using within the bump channel to make the surface 'bump'out as in the image, or using it as a reflection map so the material will reflect that image as though it is part of the enviroment. Examples were given for each channel(property) within the material editor.
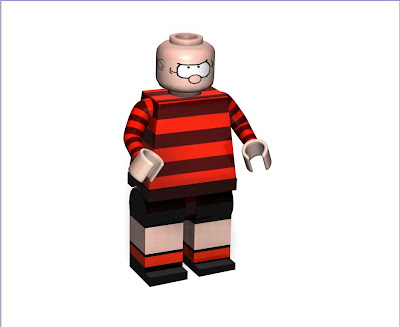
-Creating the face on the lego mans head.
using an image created in photoshop to map into the colour channel of the material for the head. We were shown how to position the image/texture so it appears correctly on the model.
The exercise was repeated to create an image on the torso. An example was given where the texture can be applied to only one polygon.


The following image shows the material applied to the head, and the settings that are adjusted to fit the image to the model correctly. cylindrical mapping gave the best fit for the head.
I applied the other textures in the same way. The body worked best with cubic mapping and the arms were best left with the default uvw mapping.
3Point Lighting
The next part of the lesson was a tutorial in 3 point lighting. 3 point lighting is good for realistically lighting an object, without drastically increasing render times. Better looking methods of lighting are available although these can cause much longer rendering times.
Image shows the result of the tutorial.
I played around with this setup and found that the scene looked much better with the ground plane being excluded from illumination by the backlight and area light.
The Image below shows results after changing the brightness of each light and repositioning them slightly. only the main light affects the floor. While all 3 lights affect the character.

No comments:
Post a Comment